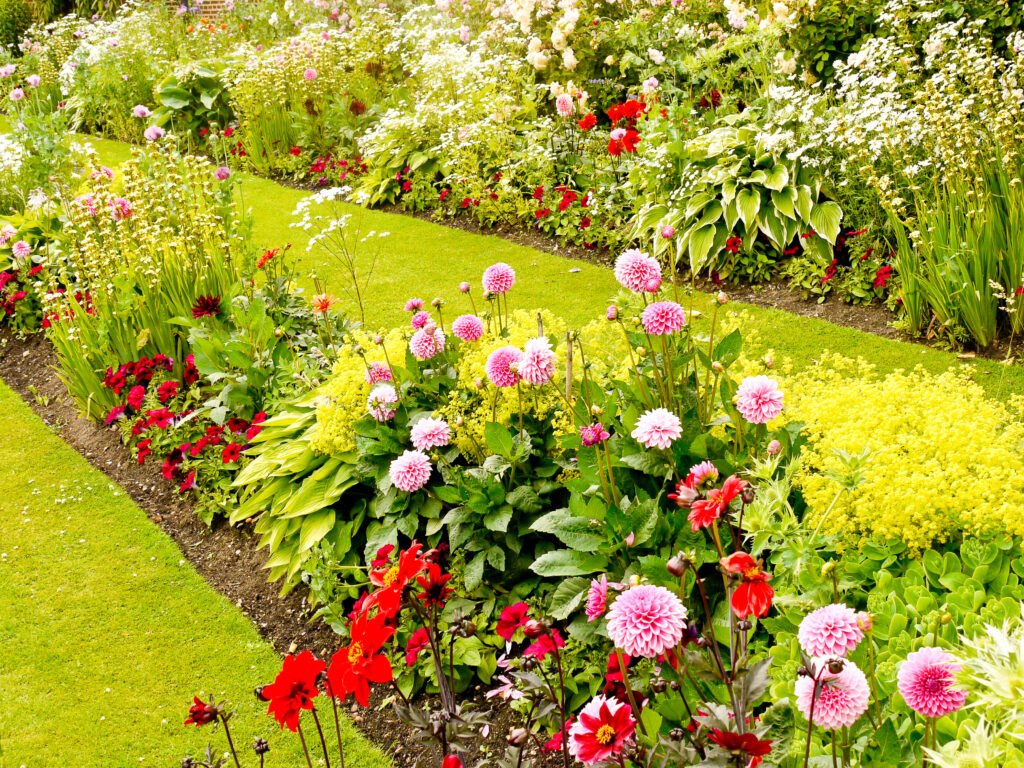
Dahlias, with their stunning array of colors, shapes, and sizes, are a favorite among gardeners looking to add vibrant, long-lasting beauty to their landscapes. Growing dahlias might seem daunting, but with a little guidance and patience, you will be rewarded with a spectacular display from mid-summer to the first frost. This guide will walk you through everything you need to know to successfully grow and maintain these captivating flowers, ensuring your garden flourishes.
Understanding Dahlia Tubers
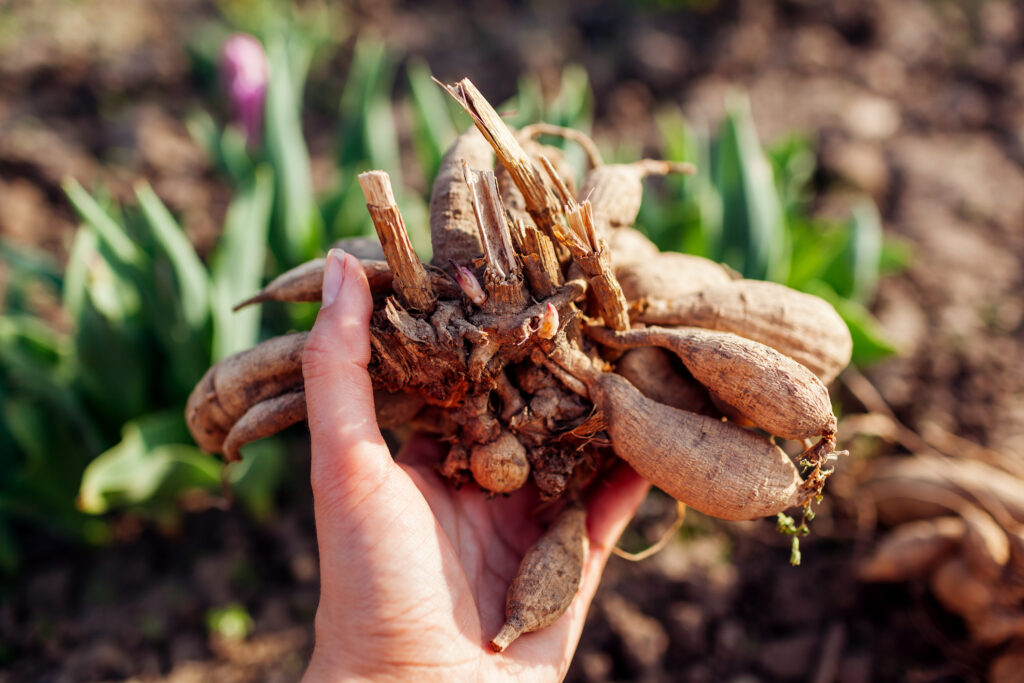
Dahlia tubers are bulbus storage roots. When fully mature they grow in a circular starfish-like pattern with several tubers attached to a central crown. When starting a new dahlia, mature plant roots are divided into separate tubers and the same but new plants will grow from single or several tubers.
It is important to understand that different dahlia cultivars will have different-sized and shaped tubers. This is normal. They are all dahlias, but not all dahlias are the same, just like people or snowflakes. Some Dahlia variety tubers will be short & wide, while others may be long & thin. However, each tuber has a neck and crown. The eyes originate and grow from the crown at the tip of the neck.
When Should I Plant Dahlias?
Plant from dormant stored tubers in spring, after any threat of frost has passed.
In colder climates, tubers may be started in pots indoors, to get a jump on the planting season. Start them approximately 6 weeks before the last average frost date.
Choosing The Perfect Location For Your Dahlias
Sunlight
Choose a sunny, protected site free from heavy winds or the potential of standing water. Dahlias are considered tender perennials.
Soil
Soil for Dahlias should be well-drained and organically rich. Dahlias usually rot in heavy, wet soils.
Planting Dahlias
Preparing The Soil
In well-drained, organically amended soil prior to planting, incorporate ½ to 1 lb. of 3-5-3 Espoma® Bulb-Tone® or similar product into the bottom of each planting hole or apply at a rate of 2.5-3 lbs. per 100 sq. ft. for larger beds or planting areas.
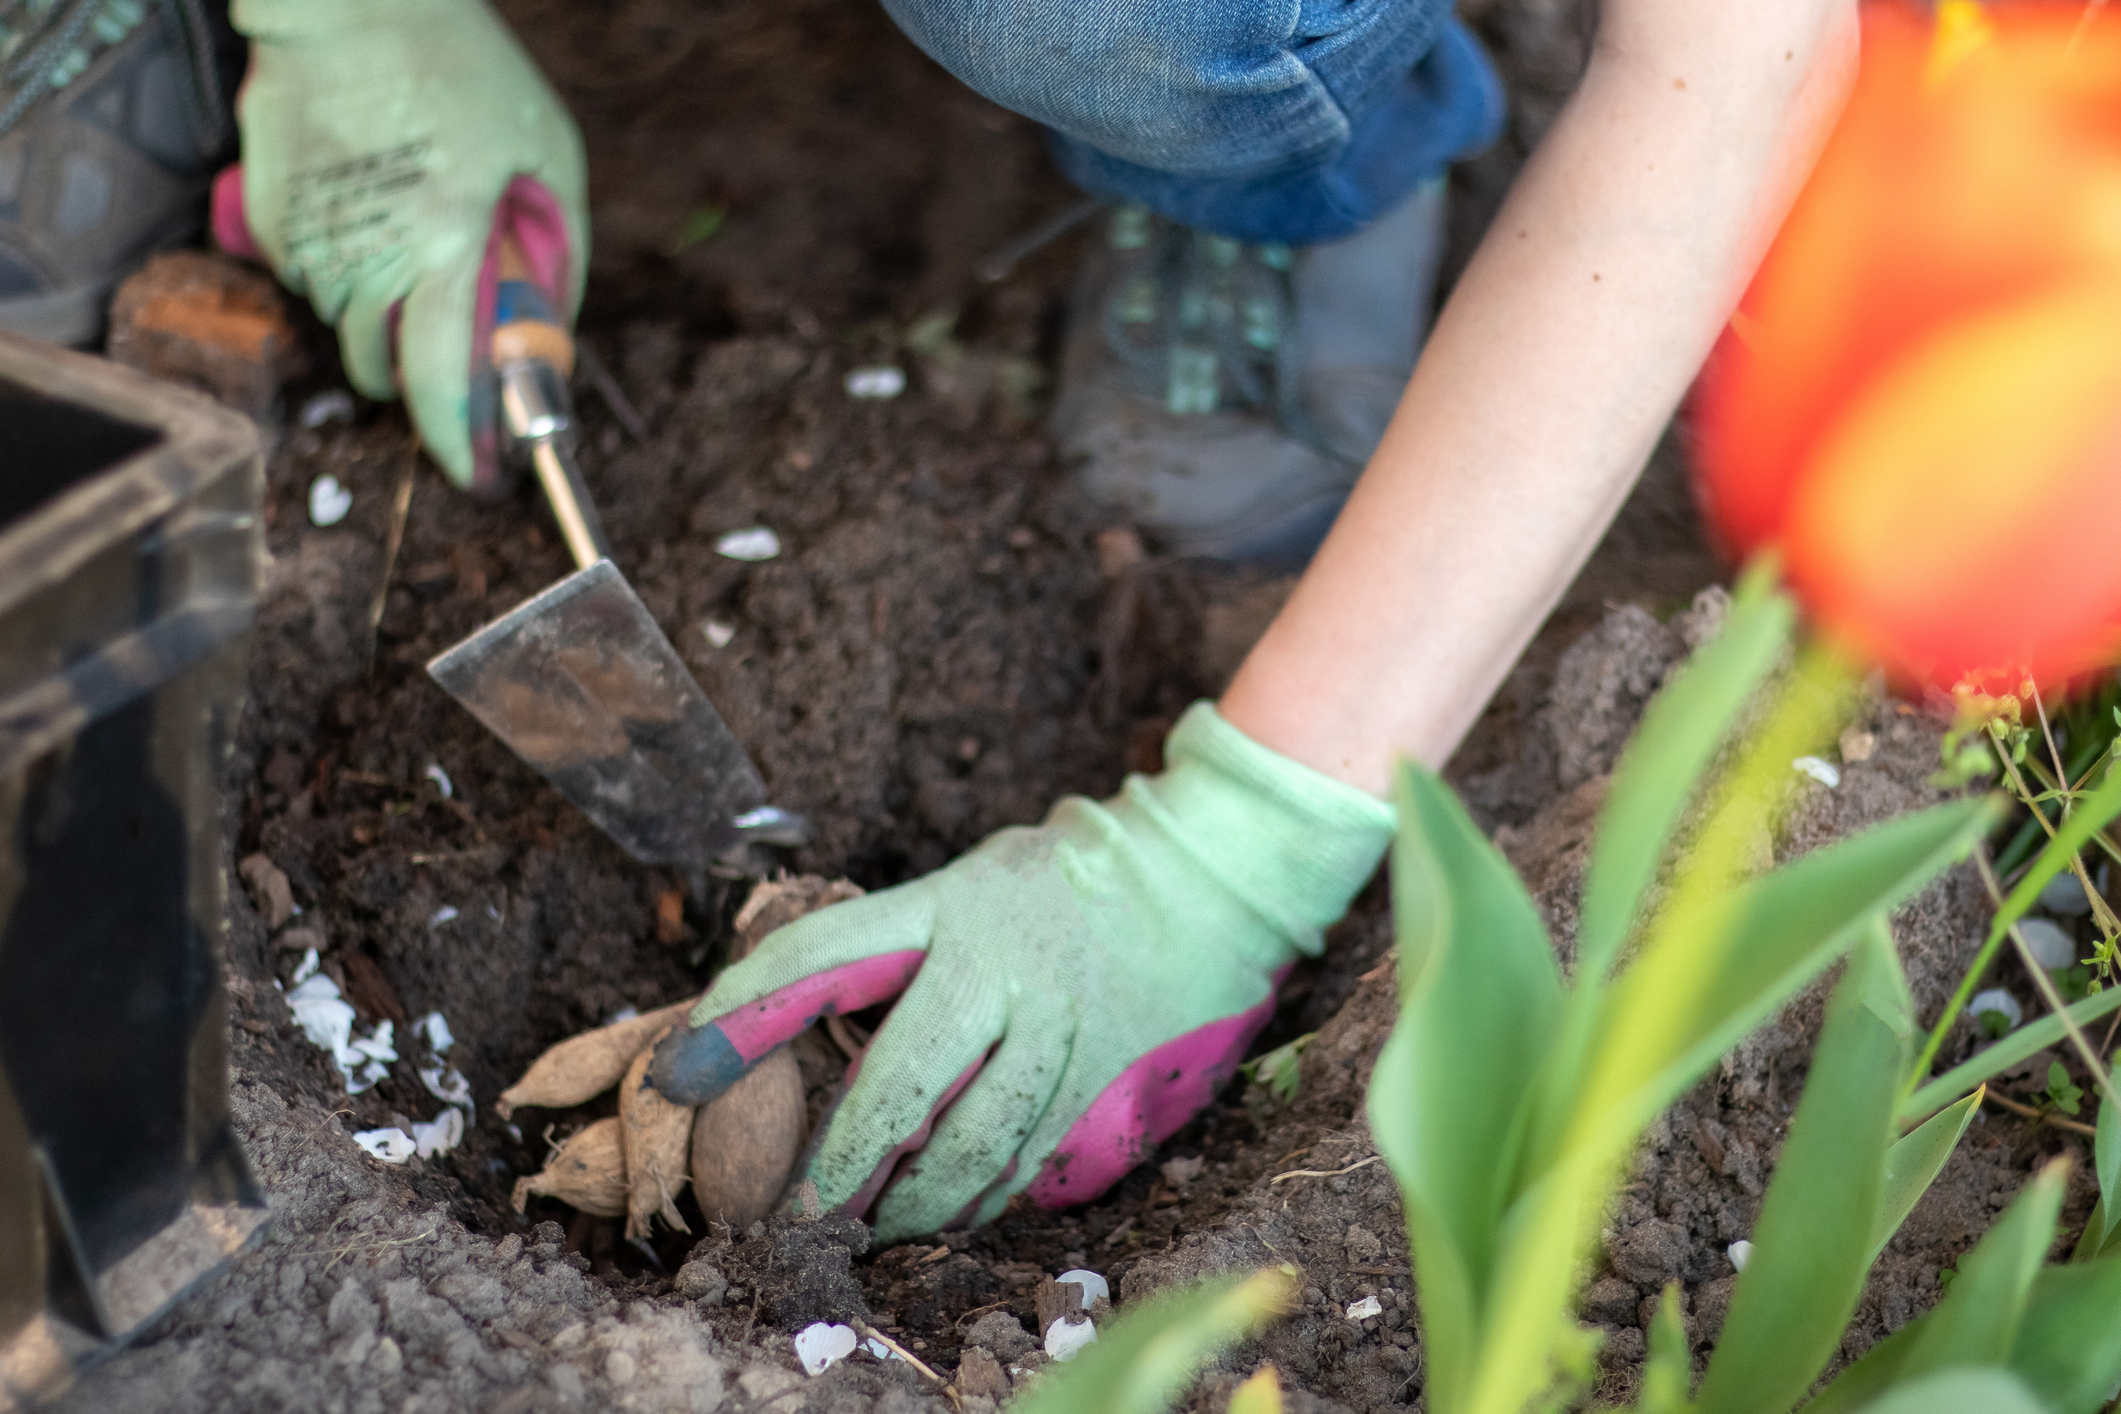
Dahlia Planting Instructions
- Dig individual holes or simply dig a furrow for multiple tubers.
- Place tubers lying horizontally, 4-6 inches deep with eyes facing up. Note: Know that eyes may be tiny and not visible at all. Don’t worry, new shoots will self-right to grow upright.
- After planting, water is just enough to moisten the soil.
- Larger tubers can be planted an inch or two deeper, up to 8 inches deep. Still, most growers will cover deeper planted tubers with only 3 inches of soil until new growth emerges. Then add amended soil as shoots gain height until they are fully covered.
- Proper spacing is generally 1-2 feet apart. Larger growing varieties benefit from wider spacing and smaller types can be slightly closer at 10-12 inches apart. Note: Over-crowding can inhibit blooming.
Jung Top Tip: Most of our Dahlias grow to a self-supporting size of 3 to 4 feet. If taller varieties are grown, adding stakes during planting may be needed. Put support stakes near the crown end before covering the tubers to avoid accidentally spearing and scaring the tubers.

Starting Dahlias Indoors
- Start Dahlias about 6 weeks from the desired planting out date.
- Use pots that are at least 18″ deep and wide.
- Use a peat-based, fertilizer-free sterile potting mix with good drainage.
- Fill pots with about ½ pre-moistened mix, set tubers as you would in-ground, and cover with only 2-3 inches of soil.
- Once shoots begin growing, add potting soil periodically as shoots gain size.
- Dahlia plants should be about 12 inches tall when you move them outside.
Note: Hardening off new plants for 7-10 days, is helpful to avoid acclimation or transition issues.
Watering
Water sparingly at first to avoid over-watering and causing tubers to rot before they start to grow. Once plants reach 6-10 inches tall, regular watering using the 1 inch per plant per week rule is best during the rest of the growing season.
Dahlia Spring Care
Fertilizing
The biggest mistake many gardeners make with their dahlias is overfeeding them. The point of growing Dahlias is to have flowers, however, to bloom well, Dahlias should be fertilized with a complete plant food that is low in nitrogen and higher in phosphorus. As with roses, vegetables, and other flowering plants, the first number (N) should never be higher than the middle number (P) and the third number (K) will be like the first. Naturally derived, water-soluble fertilizers like Algoplus Flowering Plant (4-6-7) formula work well.
First applications should be within 30 days of planting and repeated approx. 3-4 weeks later. Avoid composts, manures, or Fish fertilizers, with high nitrogen. These nitrogen sources promote weak stems, and little to no blooms, along with tubers that rot or shrivel in storage.

Pinching & Disbudding
Pinching and disbudding are both important steps to the flowering success of Dahlias.
- Pinching is simple but necessary to create bushy, well-proportioned plants. The bushier the Dahlia the more flowers a plant can produce. Pinching is the simple act of removing the center of the stem. This is done once a young plant has produced 4-6 sets of leaves. As the plant matures, side shoots may also benefit from pinching as they grow. Pinching centers cause bushier plants from more branching lower in the plant.
- Disbudding is important to achieve the best and biggest blooms. Beginners are most likely to skip this step, where savvy growers who raise Dahlia flowers for Dahlia Society Shows, State Fairs, or for florists know how essential proper disbudding is to produce large, perfectly formed flowers on long stems. Dahlias typically produce more blooms than a plant can support. Disbudding helps to focus the plant’s energy on only a select number of flowers. Disbudding is simple too. When the flower buds of the tip cluster are about the size of peas, remove all but one. At the same time, pinch out the small, tender growth buds below in the leaf axils of the next set of leaves on the stem. If you are cultivating a shorter bedding variety, you might also want to disbud from the next set of leaves after that. Obviously, for basic garden growing balancing the number of flower buds to the size of the plant will yield the best overall appearance of the Dahlias.
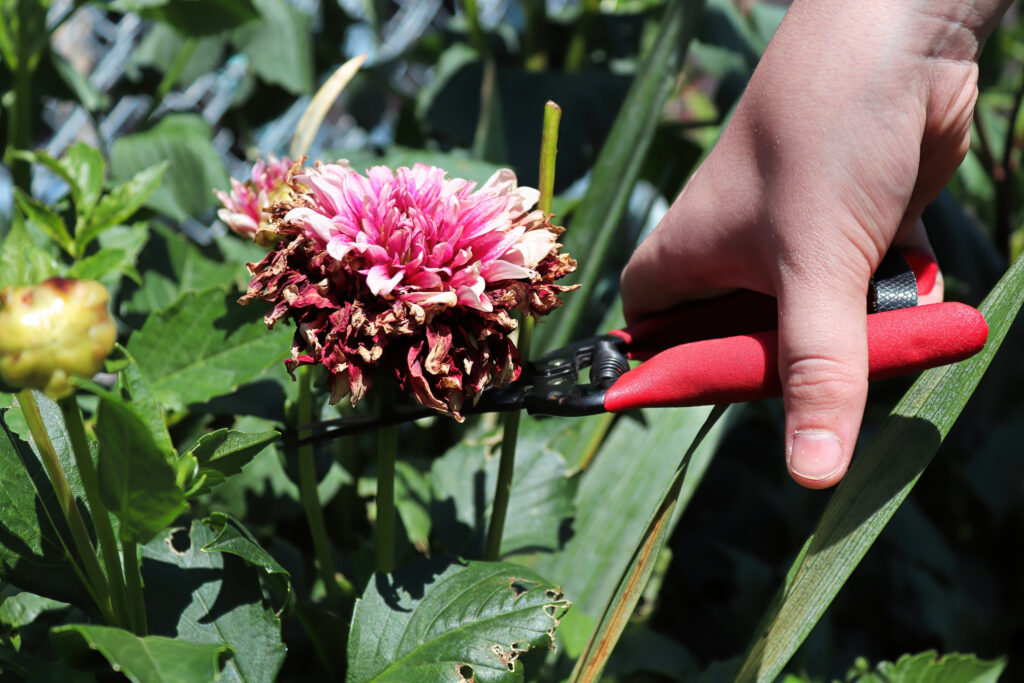
When To Cut Flowers
The best time to cut flowers is during cool mornings. For the longest-lasting blooms, place cut stems into 2-3 inches of hot water (approx. 160°-180°F) and allow them to cool for at least one hour. This will set your blooms and help make flowers last for 4 – 6 days. Deadheading as needed will keep your plants strong and blooming late into the season.
Fall Tasks For Dahlias
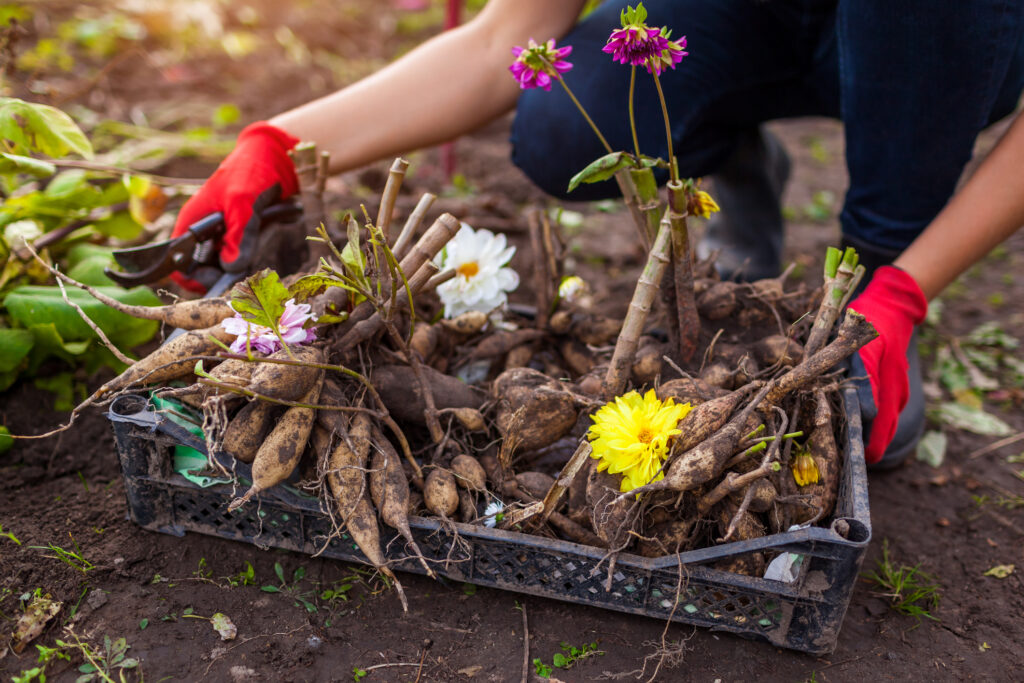
Fall Digging
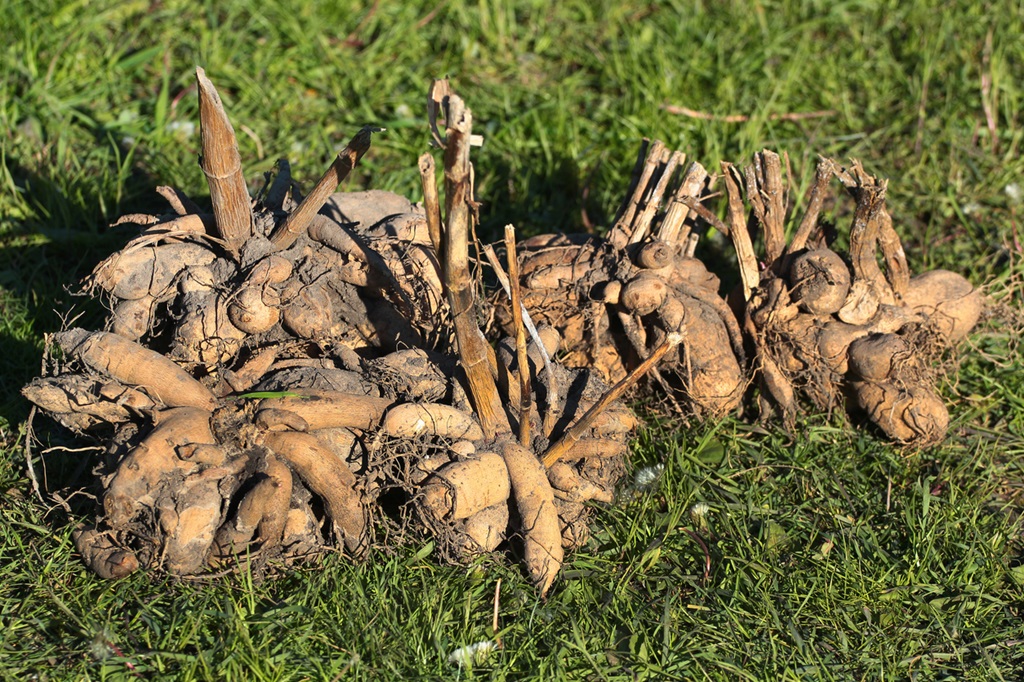
Fall digging commences after stems have died back from the first hard frost. Using a spade or fork, plunge in and lift tubers judiciously working all the way around each plant. Make sure to start at least 1 foot back from the center of the plant to avoid damaging tubers. Once you locate the tubers you can move closer.
Tips For Fall Digging
- Tubers, necks, and crowns can be fragile and susceptible to breakage, so be careful.
- Lift tubers, brush off loose dirt, and set them in a well-ventilated space out of direct sun to dry for a few days until any residual soil can easily be rubbed, wiped, or brushed off the tubers.
- Avoid using water, to clean tubers. Tubers must be as dry as possible to store successfully.
- Cull and toss out any tubers that are cut or damaged. They usually rot from fungal infection while in storage and can potentially corrupt other tubers.
- Before storing, separate clumps for new plants the next year. (See Dividing Tubers below) Make sure each tuber has a part of the stem with a neck and crown. To avoid mixing up varieties, label the tubers with an indelible pen at the time of digging.

How To Divide Tubers
Dividing is typically done in the fall prior to storing which allows for cut pieces to heal. Divisions can be done in the spring prior to replanting as well.
Use sharp pruners or a knife to cut through the tubers. To prevent accidental fungal or bacterial infections, sterilize blades first with Lysol® spray, wipes, or a 10% bleach & water dipping solution.
The eyes will be located on the center stalk and each root must have at least one eye to grow. Not all tubers will have an eye. Removing a piece of crown with each tuber is the best way to ensure they will have an eye, however, if you are unsure or cannot see any eyes, then only divide clumps into half or thirds. Again, cut surfaces should be allowed to dry overnight before planting or storing.
Winter Storage for Dahlias
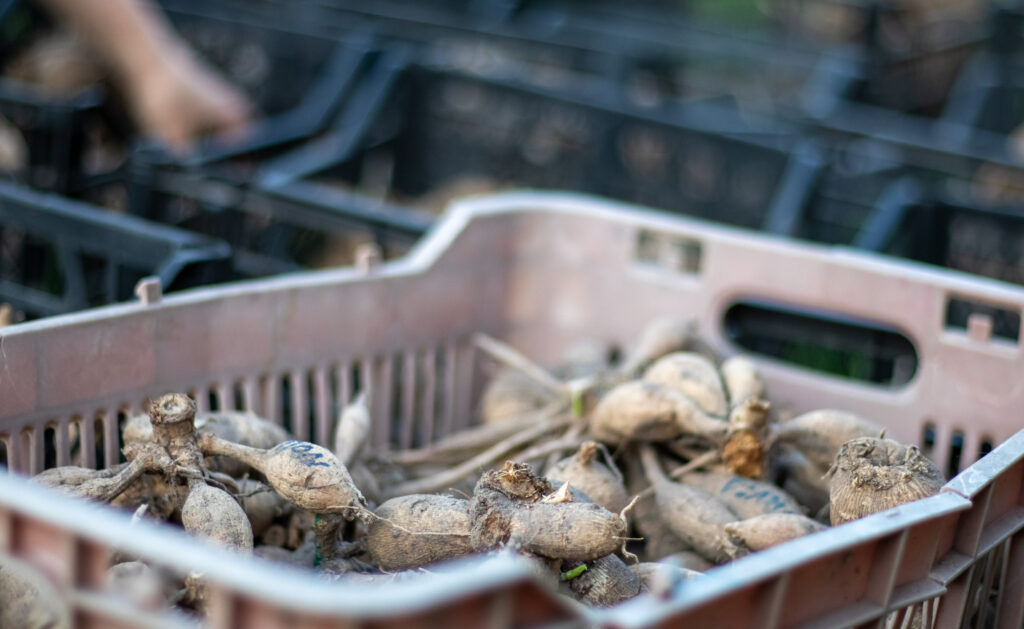
Use a storage medium such as peat moss, sand, or pet bedding material (sawdust or shavings). Tubers should be stored in crates or cardboard boxes. We recommend lining the containers with several sheets of newspaper. It is best not to stack tubers, but if you must, start with packing medium in the bottom. Alternate layering tubers with medium until the container is full.
Jung Top Tip: Never store in sealed plastic bags or bins, as these cause damaging condensation.
Storage Tips by Zone
- Zones 6 and colder – Tubers must be dug out in early fall to store for the winter.
- Zone 7 – Tubers may be left in-ground only in well-drained soils. They must be cut back and mulched over well to overwinter successfully, but colder-than-average winters may lead to some losses.
- Zone 8 to 11 – Cut the back stems and mulch for winter.
Storage Temperatures
Store tubers in a cool, dry area (a temperature of 40°-50°F is best). Too-warm tubers can wrinkle/shrivel. Too cold and they can freeze, or too humid/wet tubers will rot.
How Often Should I Check On My Stored Dahlias?
Check your tubers once a month throughout the winter storage months and adjust conditions as needed.

Growing dahlias can be a rewarding experience by adding vibrant colors and lush blooms to your garden. With the right care and attention, you can enjoy these stunning flowers year after year. Whether you’re a seasoned gardener or just starting out, following these guidelines will help you cultivate healthy, beautiful dahlias.
Other Recommended Reading
- Add Dimension To Your Garden With Summer-Blooming Bulbs
- Iris Growing Guide
- An Easy Guide to Growing Amaryllis
- Fall Bulb Planting Tips
- 6 Tips For Storing Bulbs During Winter
- An Easy Guide To Forcing Bulbs
At Jung Seed Co, we strive to be your go-to guide for all your gardening needs. Our YouTube channel The Garden Doctor by Dick Zondag is where he provides gardening tips for all levels of gardeners. When you need reliable gardening advice, turn to the trusted experts at Jung.
View our new catalog online or browse our website for your gardening favorites. To receive info on new products, exclusive deals, and specials, be sure to sign up for our weekly email. Join our Facebook page, to discuss all things gardening!
About the Author: Dan Goodspeed is a highly accomplished and respected horticulturist, bringing years of both educational and hands-on experience from various locations across the U.S. His extensive background includes serving as a horticultural consultant for the Jung Seed Company and its affiliates.
Edited By: Jaclyn Johnsen – Digital Marketing Manager at Jung Seed Company