Updated: September 10, 2024
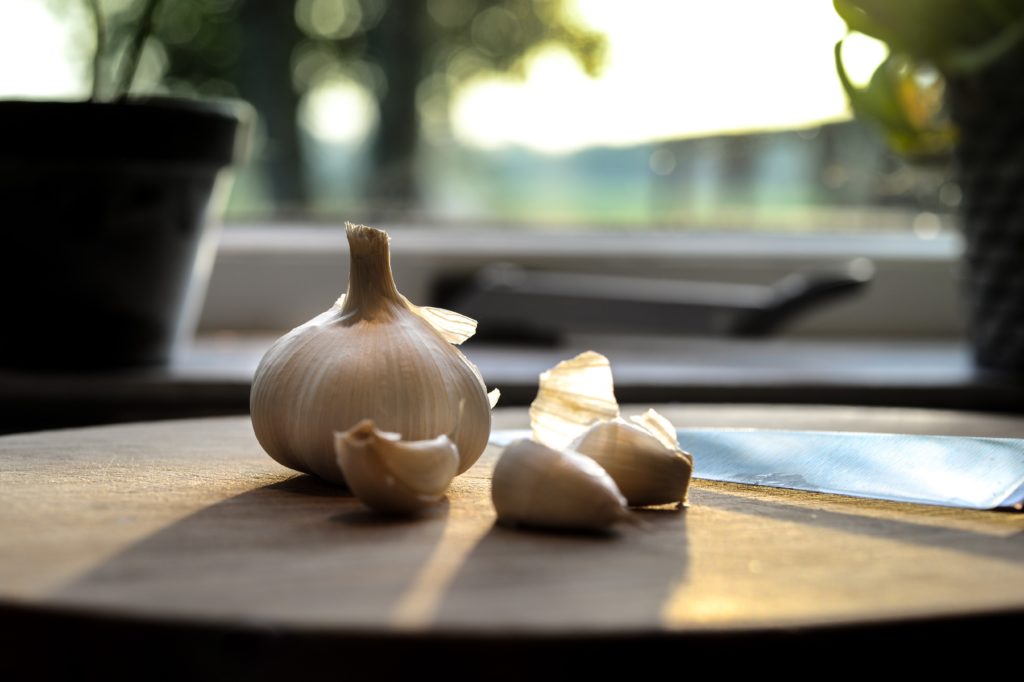
Homegrown, properly harvested and stored garlic provides a fresh flavor that can not be matched by any supermarket garlic. Garlic is relatively easy-to-grow. It is a hardy perennial vegetable, though it has a fairly long production season. It is a crop well worth considering for your garden.
Types of Garlic
There are two main types of garlic – softneck and hardneck (sometimes called “stiff neck”) forms.
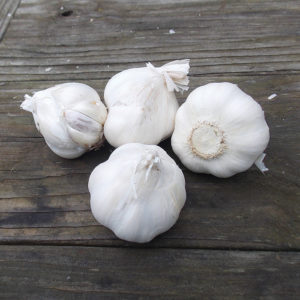
Softneck varieties generally produce more cloves per bulb and store longer than hardneck types. The same softneck garlic variety common in supermarkets can be grown in the garden. However, there are many additional varieties available, giving a wide range of different flavors for the adventurous gardeners and cooks.
Examples of softneck garlic varieties include – California White Garlic, Italian Late Garlic, and Silver Rose Garlic.
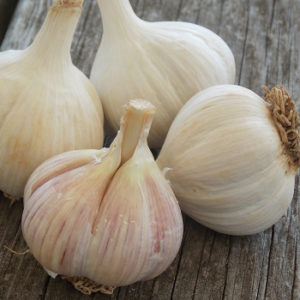
Hardneck garlic produces a stiff central flowering stem, while softneck varieties generally do not produce this stem, making the leaves more suitable for braiding. Hardneck varieties are generally more cold-tolerant than softneck types and are often considered “gourmet” garlic.
Examples of hardneck garlic varieties include – Korean Red, Spanish Roja, and German Porcelain.
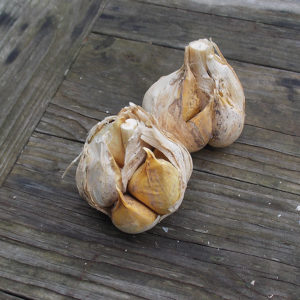
Elephant garlic is a large, mild type of garlic that produces a large bulb with very few, large cloves. It is more closely related to leeks than to garlic. Elephant garlic is somewhat less hardy than standard garlic. With Elephant garlic, when planted in the spring, a certain number of the crop, that first season, will only produce round, firm onion-like bulbs with no segmentation, which is perfectly normal. These bulbs can then be replanted in the fall to produce extra-large segmented cloves by the end of that next season. Win, win!

When to Plant Garlic
Fall Planting
Fall planting is best in cold climates to ensure the best yield of large, full-sized bulbs. When fall planted, roots emerge and become established and ready to support vigorous growth the following spring. This early root establishment allows garlic plants to grow faster and produce increased yields of larger bulbs than those planted in spring.
In northern areas, plant cloves in fall 4 to 6 weeks before the ground freezes. This gives the plant time to develop roots and gives plants a head start on growth. Where winters are milder, garlic can be planted from October through January. In southern areas, plant garlic in late February to early March.
Spring Planting
In most climates, garlic is best planted in the fall. However, cloves can also be planted in spring as early as the soil can be worked. Growth will not be as vigorous compared to fall planting, and harvest will be smaller and somewhat later.
In areas with a short growing season, it may require two seasons to produce a full-sized bulb from spring planting. To check bulb size, wait until the tops die back and dig a few bulbs. If cloves are not large or if the bulbs hold just a single round clove, wait until the following season to harvest.
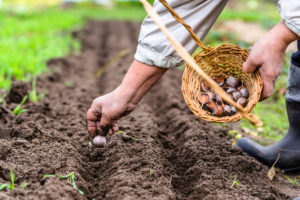
How to Plant Garlic
Garlic needs fertile, loose, well-drained soil. It is a moderate to heavy feeder and grows best in soils with a pH between 6 and 7. Avoid planting garlic in areas where water stands for a long period of time after a rain. If the area you are planting in is low or the soil is heavy, plant garlic in raised beds amended with compost or peat moss to ensure the soil drains well.
Garlic is grown vegetatively and does not produce seeds. This means new bulbs grow from cloves split from a bulb. Each clove grows underground, forming a new bulb composed of cloves. In short season, cold climate areas, it may take two years for cloves to produce large bulbs.
Before planting, separate garlic bulbs into individual cloves. Sow individual cloves with the root or blunt end down and the pointed side up. Where winters are mild, plant cloves 1 inch deep. In cold areas, plant them 2 to 4 inches deep. Space the cloves 4 to 8 inches apart with 18 to 30 inches between the rows. The exception is Elephant Garlic which is sent as large, individual clove and should be planted 4 to 6 inches deep and spaced 8 to 10 inches apart. Cover the cloves so they are buried 1 to 2 inches below ground and gently firm the soil around them.
Mulch the garlic rows lightly immediately after planting. Garlic has no problem growing through an inch of mulch in spring. Mulch also helps to reduce weed problems. In cold areas, mulching with an additional 4 to 6 inches of chopped leaves or clean straw will keep the soil warm and promote strong root growth during the fall.
When planting from garlic bulbs grown in the garden, replant new cloves in fall after the garlic is cured. For the biggest yield and the largest bulbs, choose only large, firm cloves for replanting.

Garlic Maintenance
Summer & Fall Care
In mid-summer, mulch can be removed from garlic beds if desired. Stop watering so the soil begins to dry out. This helps to dry the outer layers of the bulb and hastens the maturing process, giving the best chance for a good curing and long storage life of the bulbs. Avoid using high nitrogen fertilization starting in early summer, as this may delay bulb formation.
Spring Care
In spring, fertilize moderately with a high nitrogen fertilizer. Garlic is shallow rooted so it benefits from several fertilizer applications through the season. Once bulbs begin to form, discontinue fertilizing to get the best quality bulbs. Keep the soil moist during the growing period, but water less frequently as harvest approaches to avoid molding and staining, plus the bulbs will store better.
Garlic does not compete well with weeds, so ensure that weed control is good during the season. When cultivating to remove weeds, be careful and cultivate only shallowly, as garlic roots do not penetrate the soil deeply. Maintaining mulch around the plants will help to reduce weed problems.
Bulbils
In late spring, hardneck varieties of garlic send up flowering stalks that produce a shoot that grows in a curve. These shoots (called “scapes”) will form small bulbils if left on the plants. The bulbils use the energy needed to form large garlic bulbs underground, so remove them as soon as they appear. The scapes can be chopped finely and used in cooking or salads to provide a mild, garlic flavor. Elephant garlic will produce a stalk with flowers in spring. The flower buds should be removed to promote the formation of large bulbs. Bulbils can be planted in the garden, but they are quite small and it takes several years for them to produce full-sized bulbs.
Harvesting Garlic
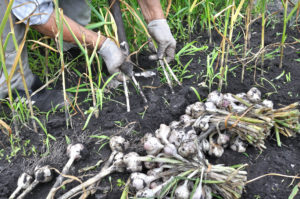
Harvest garlic when the leaves start to dry down in late August or early September when at least 4 to 6 green leaves remain. These green leaves create the papery skin covering the bulbs. Gently dig the bulbs, being careful not to bruise them. Don’t leave them in the ground too long after maturing, as the cloves will naturally begin to root and start the whole process over.
After digging the bulbs, lay them out in a ventilated, shady area on an old screen or another platform that allows for good aeration as the bulbs dry. Be sure bulbs do not get wet after harvest as they can start to root or mold if not cured and dried properly. After about 2 to 3 weeks, when the roots feel dry, remove them and any excess soil by rubbing or trimming them off. Do not wash bulbs as moisture can cause them to mold or rot.
As a final step, the leaves can be braided or tied together and the bunched garlic can be stored in a cool, airy, dry location. If desired, leaves can be cut off an inch or two above the bulbs.
Save the largest bulbs for replanting. The best time to start plants over again in late September to early October.
Storing Garlic
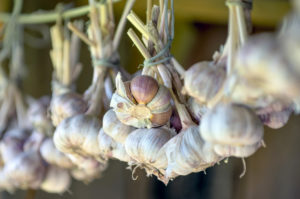
They may be either tied in small bundles and hung up to dry in a cool, shaded, well-ventilated location or spread out in single layers on screens or slatted shelves. After curing for 2 to 3 weeks, hang the dried bunches in a cool, shaded location. You may also cut the stalks off 1/2 inch above the bulb and store them in mesh sacks with good air circulation on all sides.
Perfect storage conditions are 45 to 55 degrees F at 50% relative humidity. Storage below 40 degrees F makes garlic sprout.
Which vegetables should you plant near your garlic? Which should you avoid? Check out our Companion Planting Guide.
Other Recommended Reading


At Jung Seed Co, we strive to be your go-to guide for all your gardening needs. Our YouTube channel The Garden Doctor by Dick Zondag is where he provides gardening tips for all levels of gardeners. When you need reliable gardening advice, turn to the trusted experts at Jung.
View our new catalog online or browse our website for your gardening favorites. To receive info on new products, exclusive deals, and specials, be sure to sign up for our weekly email. Join our Facebook page, to discuss all things gardening!